In this tutorial, I will be building out a backend CRUD (create, read, update, delete) application using MySQL as the database and JavaScript as the programming language with the help of some npm packages.
The process to start with the application,
- First, create a folder called “MySQLBackend“
- open the folder up in your text editor
- next, open terminal in VS code and type
npm init -y - install the npm dependencies
- create the folder structure as follows under the “MySQLBackend” > config, controllers, models and routes.
- Add all files to the folders
- create the server.js file
Prerequisites
You must have some programs installed on your computer or device.
- Node js >= 16
- npm >= 8
- XAMPP (PHP server with MySQL)
Install MySQL2, Express, Cors and Nodemon
Create a folder called “MySQLBackend” or what ever you want?
Open Visual Studio Code (VS code) and open the terminal, you should be in the current folder.
MySQLBackend>Next we create the package.json file
npm init -yHere we add all our dependencies with the following command
npm install express mysql2 sequelize corsNow we add our development dependency
npm i --save-dev nodemonA quick view of the package.json file, please note on the 4th line "type": "module", must be included to use the ES6 module syntax in our application.
MySQLBackend > package.json{
"name": "MySQLBackend",
"version": "1.0.0",
"description": "",
"type": "module",
"main": "server.js",
"scripts": {
"test": "echo \"Error: no test specified\" && exit 1",
"start": "nodemon server.js"
},
"keywords": [],
"author": "",
"license": "ISC",
"dependencies": {
"cors": "^2.8.5",
"express": "^4.17.1",
"mysql2": "^2.3.3",
"sequelize": "^6.12.0-alpha.1"
},
"devDependencies": {
"nodemon": "^2.0.15"
}
}To follow along with this tutorial, please use the exact code for all this to work.
MySQL + Node + Express overview
This application is based on property managing, it will list out all of our properties, add new ones and be able to edit and delete them as well. Basic CRUD application and can be used and modified for any application.
Setting the database
Start the XAMPP application and open PhpMyAdmin
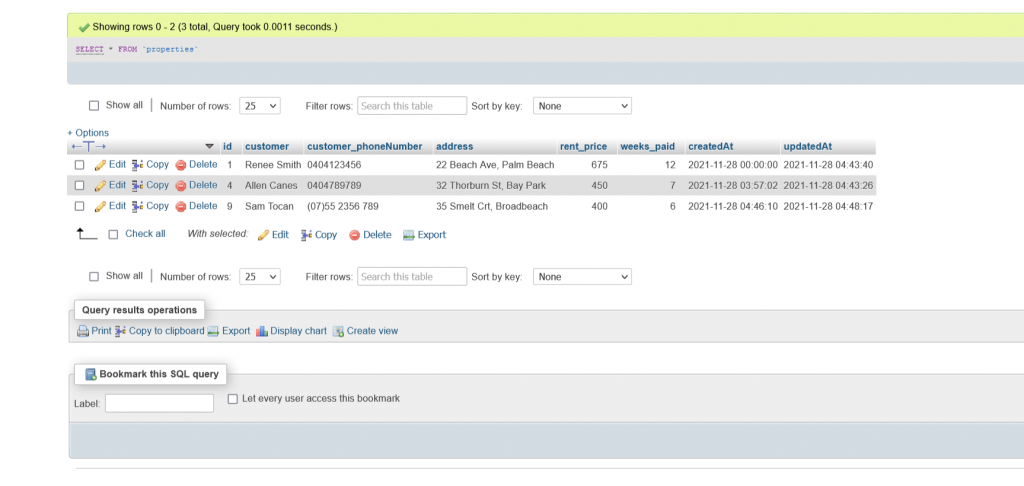
localhost/phpmyadmin/index.phpHere we will create a new database called “propertymanager” with a table called “properties” that has the following fields:
- id, customer, address, customer_phone, rent_price, weeks_paid, created_At

Folder structure
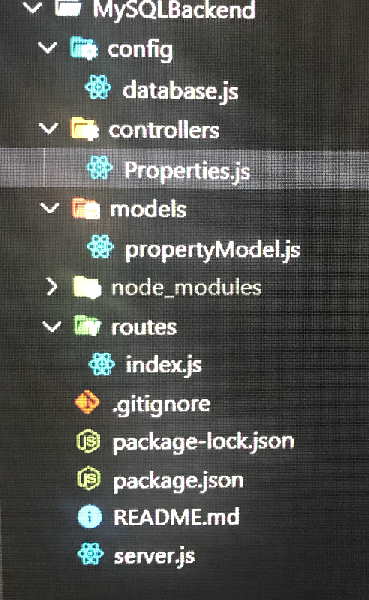
Here is an overview of the folder structure in the application named “MySQLBackend“. We apply the MVC (model, view, controller) pattern for a more neatly and organised construct.
"MySQLBackend"config>database.jscontrollers>Properties.jsmodels>propertyModels.jsroutes>index.js

Connecting the database
Open the database.js file
MySQLBackend > config > Database.jsAdd the following code.
// Connect to the database
import { Sequelize } from "sequelize";

// database name 'propertymanager' username and password
const db = new Sequelize('propertymanager', 'root', '', {
    host: "localhost",
    dialect: "mysql"
});

export default db;
Note* my username is root and password is blank.
Models
Open the models.js folder with the file called propertyModel.js
MySQLBackend > models > propertyModel.jsAdd the following code
import { Sequelize } from "sequelize";
import db from "../config/database.js";

const { DataTypes } = Sequelize;

const Property = db.define('properties',{
    customer:{
        type: DataTypes.STRING
    },
      address:{
        type: DataTypes.STRING
    },
      customer_phoneNumber:{
        type: DataTypes.STRING
    },
     rent_price:{
        type: DataTypes.INTEGER
    },
    weeks_paid:{
        type: DataTypes.INTEGER
    }
},{
    freezeTableName: true
});

export default Property;
Controllers
Now open the controllers folder with the file called Properties.js
MySQLBackend > controllers > Properties.jsAdd the following code
import Property from "../models/propertyModel.js";

export const getAllProperties = async (req, res) => {
    try {
        const properties = await Property.findAll();
        res.json(properties);
    } catch (error) {
        res.json({ message: error.message });
    }
}

export const getPropertyById = async (req, res) => {
    try {
        const property = await Property.findAll({
            where: {
                id: req.params.id
            }
        });
        res.json(property[0]);
    } catch (error) {
        res.json({ message: error.message });
    }
}

export const createProperty = async (req, res) => {
    try {
        await Property.create(req.body);
        res.json({
            "message": "Property Created"
        });
    } catch (error) {
        res.json({ message: error.message });
    }
}

export const updateProperty = async (req, res) => {
    try {
        await Property.update(req.body, {
            where: {
                id: req.params.id
            }
        });
        res.json({
            "message": "Property Updated"
        });
    } catch (error) {
        res.json({ message: error.message });
    }
}

export const deleteProperty = async (req, res) => {
    try {
        await Property.destroy({
            where: {
                id: req.params.id
            }
        });
        res.json({
            "message": "Property Deleted"
        });
    } catch (error) {
        res.json({ message: error.message });
    }
}
Routes
Open the folder called routes with a file called index.js
MySQLBackend > routes > index.jsAdd the following code
import express from "express";

import {
    getAllProperties,
    createProperty,
    getPropertyById,
    updateProperty,
    deleteProperty
} from "../controllers/Properties.js";

const router = express.Router();

router.get('/', getAllProperties);
router.get('/:id', getPropertyById);
router.post('/', createProperty);
router.patch('/:id', updateProperty);
router.delete('/:id', deleteProperty);

export default router;
The Sever js file
Here we will create our express server. Create a new file within the MySQLBackend folder called “server.js”
MySQLBackend > server.jsAdd the following code
// using node v16

import express from "express";
import db from "./config/database.js";
import propertyRoutes from "./routes/index.js";
import cors from "cors";

const app = express();

try {
    await db.authenticate();
    console.log('Database connected...');
} catch (error) {
    console.error('Connection error:', error);
}

app.use(cors());
app.use(express.json());
app.use('/properties', propertyRoutes);

app.listen(5000, () => console.log('Server running at port 5000'));
Start the application
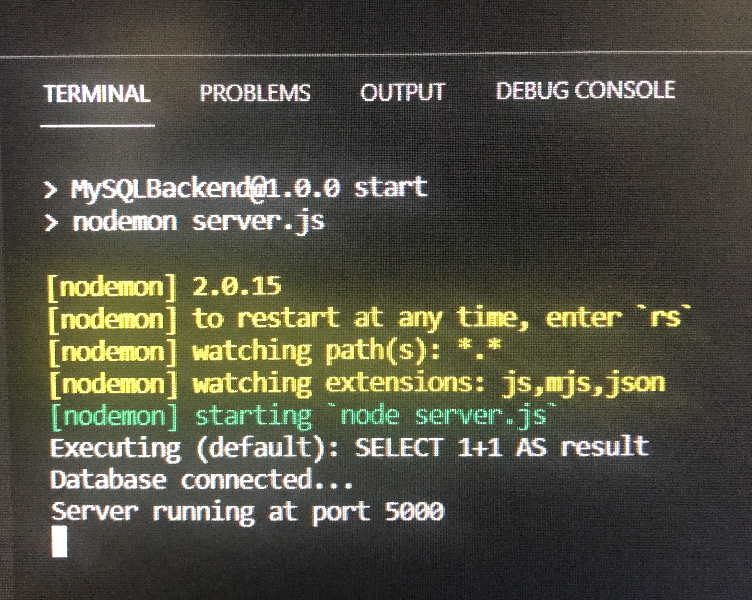
To start and run the application, type the following command in the terminal.
npm start
In our next tutorial, we’ll connect this backend app to a React js frontend, stay tuned!
